Nothing says summertime to me like a soft flowing shirred skirt! They are super easy to make and don't require too much time or fabric. I'm making the one in the tutorial for Skirt Week over at Crafterhours!

Shirred Skirt Tutorial
Required Items:
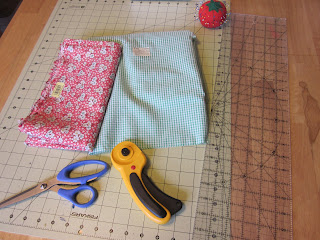
Fabric (either one or two coordinating)
Scissors or Rotary Cutter (Cutter mat if using them)
Yardstick or some way to measure your fabric
All Purpose thread
Elastic Thread (can be found at Wal-Mart or any craft store really, by the elastic, not the thread)
Pins
Sewing Machine
Step 1.
Measure the waist of the person the skirt is for (my subject was Miss K and I used a 24 waist)
Measure the length you want the skirt (for Miss K I chose 15 inches)
Step 2.
Cut two rectangles out of your fabric that is the length of your length plus 1 inch (mine was 16 inches)
and the width of your width minus 2 inches (mine was 22 inches)
** Note: in my skirt I added a different fabric to the top and bottom so I adjusted my length and width to allow for a 1/2 inch seam allowance to join fabrics. My green top piece was 4 1/2 inches and my bottom green piece was 2 1/2 inches. My middle red piece was 11 inches. After the 1/2 inch seam allowance for each piece I would then have 4 inches top, 10 inches middle, and 2 inches bottom for a total of 16 inches, which is perfect! (See step 1 for length inch requirement).
Optional Step if using 2 fabrics:
Sew each piece together with 1/2 inch seam allowance. I serged my edges but this is not required. I would zigzag each seam though to prevent fraying if not serging. After I sewed each together to get my 22 inch x 16 inch rectangle, I pressed both seams up and top stitched as shown below.
Step 3.
Pin together one side of rectangles and sew with 1/2 inch seam allowance. Again, I serged my edges but this is not required; zigzag them if you don't have a serger.
Step 4.
Now that you have one huge rectangle piece of fabric you are almost ready for the shirring. First we must do the top hem at the waist. Fold fabric over 1/4 inch and press and fold over 1/4 inch again. Pin and sew. I chose to use my double needle for this step but again, this is not necessary.
Step 5.
Shirring! Hand wind the elastic thread onto an empty bobbin. Not tight, not really loose, just right. Make sure you pull the elastic through the bobbin process as you would normally. I started having weird looking loopy elastic and it was because my elastic was not through the bobbin tension feature.
Set your stitch length to a 4 or 5. Place the edge of your presser foot up against the edge of your waist hem you made and sew on the RIGHT side of the fabric. You want the elastic bobbin thread to attach to the back, WRONG side of your fabric. Back stitch when you start and finish. On the next line down, line up the edge of your presser foot to the edge of the line you just sewed. You will do about 8 lines of this pattern. Stretch out your fabric as you go, you want to sew on flat fabric. Once you are done steam the shirring (hold iron an inch above! don't put directly on the shirring).
Step 6.
Pin the other side of the skirt right sides together and sew together (I used a full inch seam allowance here to make sure I got all the elastic shirring ends within my seam. Then I serged the raw edges. (serging is optional, zigzag if not).
Step 7.
Fold bottom hem of skirt 1/4 inch up and press. Fold 1/4 inch up again and press, pin, and sew. I again used my double needle here but it is not required. That's it! You are done!
This can be used for any size person, any length skirt or dress (for a dress, simply add more shirring lines).
Miss K was not in the mood today to try anything on, hence the completely mismatched outfit and the sad panda face.


No comments:
Post a Comment
Your comments really make my day! I read each and every one. Thank you!
Sorry for the word verification. I've had too many spammers lately.