Showing posts with label Holiday. Show all posts

Wednesday, February 12, 2020

Some Christmas Jammies

klajd I really wanted to sew all of us some Christmas Jammies this year but then I got sooooo sick at Thanksgiving (still am) and couldn’t make them all.  I already shared my Snoopy Christmas leggings here.

I did get a few things sew though.  Miss K is a slave driver and even on my death bed she is demanding.  She wanted her pajamas to match our youngest puppy.  She hounded me about it for weeks.  So I finally made them.

Lets start with the top.

Patterns for Pirates – Slim Fit Raglan top
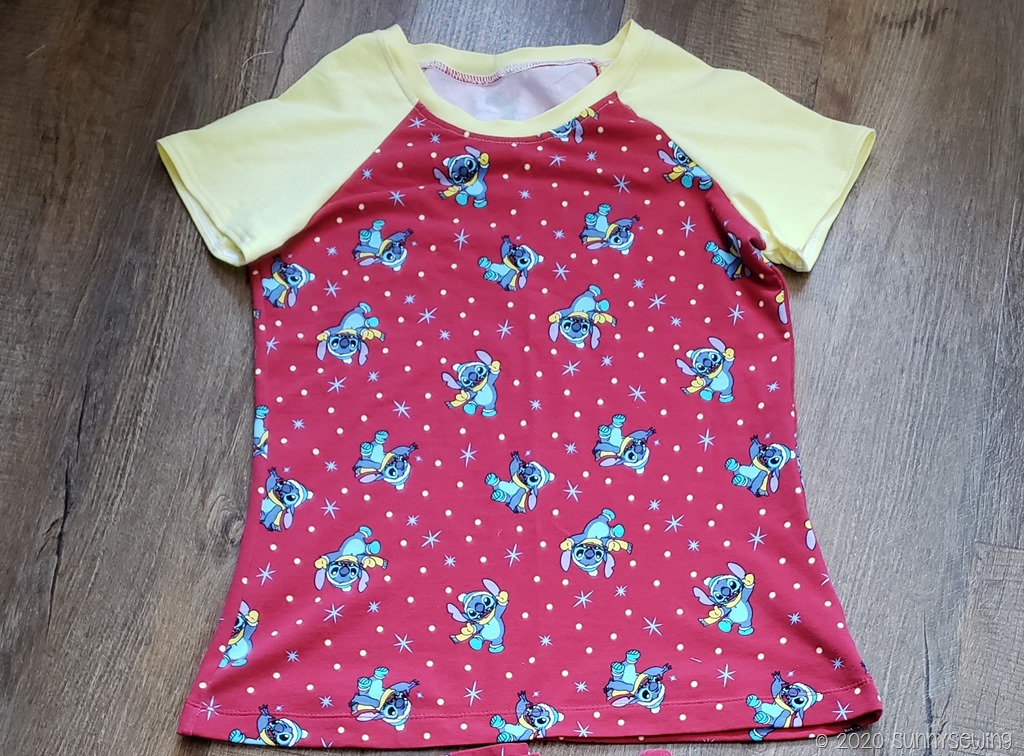
Previous Makes: none! I’ve never made the slim fit version.  I’ve sewn the relaxed raglan countless times.

Her measurements at the time:  34 bust, 27 waist, 40 hip

Size sewn: Medium

Date sewn: 12/18/19

Alterations: none

Fabric: Banana Yellow Cotton Lycra for the sleeves, from Stylish fabrics purchased July 2017 for $6.90/yard. It is listed as Jersey knit fabric combed, 10 oz.  Also used Disney Lilo & Stitch Christmas Knit fabric in red, 95% cotton 5% spandex. I purchased this Jan 2019 for only $1.70/yard!!!  I used probably 1/2 yard for this top.  It doesn’t wash very well and has weird flaws throughout the fabric, sadly.

Thoughts: Miss K hates the fit at the shoulders and bust; She does like the length.  She wore it the one time for about 5 minutes and took it off. She says she won’t wear raglan style again.

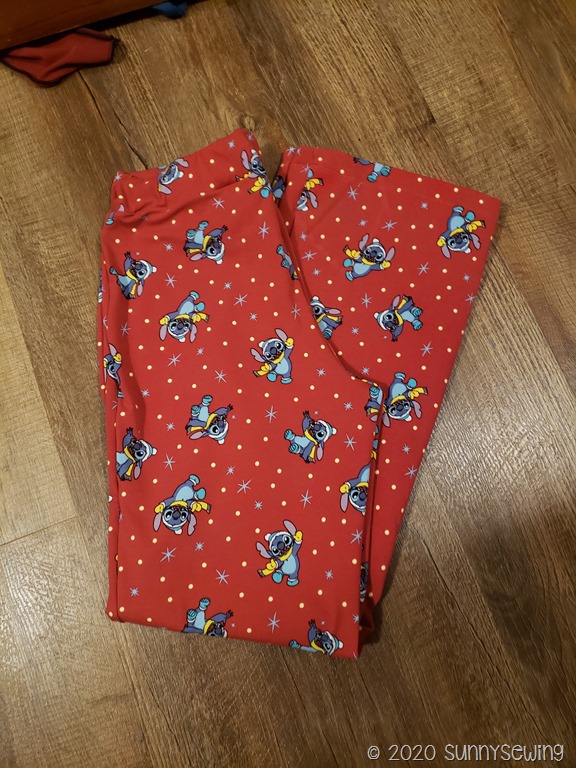
bottoms:  Burda – 11/2007 #122 20191217_195851 Previous Makes: In Sept 2017 I made a gray space dyed pair for Miss K;  In Dec 2017 I made myself 2 pairs: a purple space dye and a red yoga knit pair.  I literally live in the red pair now still.

Her measurements at the time:  34 bust, 27 waist, 40 hip
20191217_195837

Size sewn: 42

Date sewn: 12/18/19

Alterations: scooped 1/4” out of the butt curve; took in 1/2” at the waist on all sides. used half the width of the waistband piece.  Scooped 1/4” out of the front crotch curve.

Fabric: used Disney Lilo & Stitch Christmas Knit fabric in red, 95% cotton 5% spandex. I purchased this Jan 2019 for only $1.70/yard!!!  I used probably 2 yards for these.  It doesn’t wash very well and has weird flaws throughout the fabric, sadly.
20191222_131909

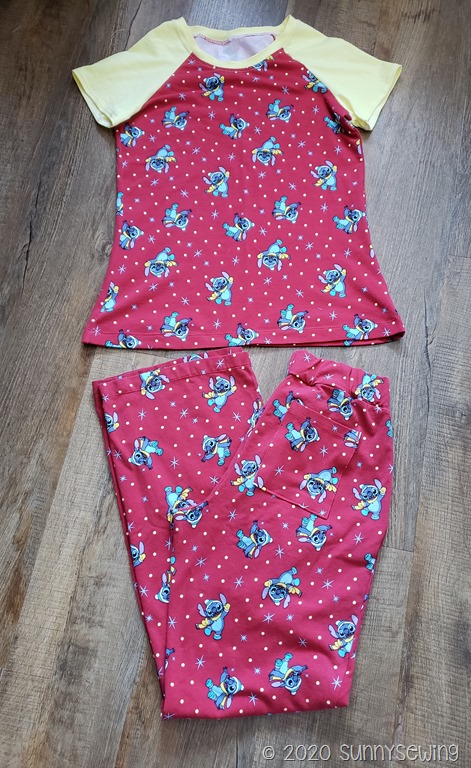
Thoughts: They are 1-2” too long at hem. They need 1/4” more scooped out of the butt curve.  Miss K made me go back and add a pocket in the butt for her phone.

She loves these and wears them a ton.  The red is fading so fast with each wash even though I wash on cold, boo. Anyway, this pattern is a winner, we both love it.

Puppy Pajamas:
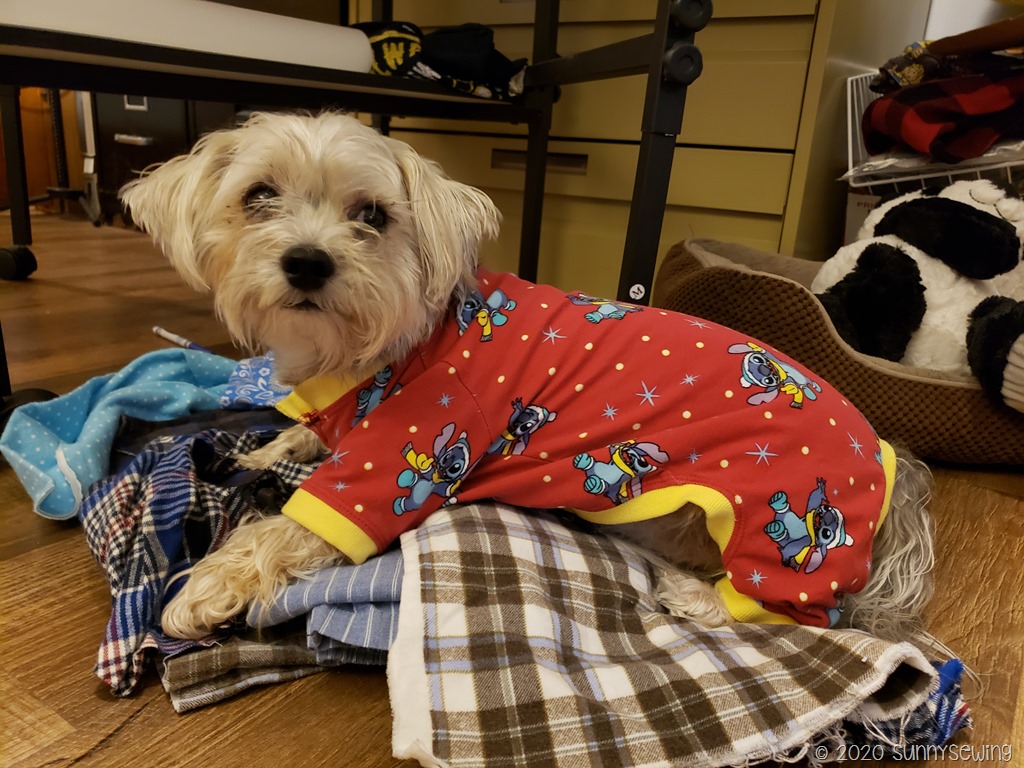
20200125_183514 Mimi & Tara – Pets Pajamas Button Up Pattern

Previous Makes: I made these one other time for Bennie but it looks like I forgot to post it! So I’ll add them to the bottom of this post.

20200210_100849

Size Sewn: Straight Medium

Alterations: took 1/2” off at Center front at waist to 0 at the neck.  He has a tiny tummy.

20200131_144819

Fabric: Banana Yellow Cotton Lycra for the bands, from Stylish fabrics purchased July 2017 for $6.90/yard. It is listed as Jersey knit fabric combed, 10 oz.  Also used Disney Lilo & Stitch Christmas Knit fabric in red, 95% cotton 5% spandex. I purchased this Jan 2019 for only $1.70/yard.  I used probably 1/2 yard for this.

20191222_132425

Thoughts: I love them! He loves them! Miss K loves that she matches him! It’s a win-win-win. And who doesn’t love puppies in pajamas!  He wears them all the time.

So in September 2018 I made these the first time for Bennie Bear.  He still wears these pajamas often.  The fabric is a light French terry that I picked up from Stylish Fabrics.  It worked perfect for his jammies.
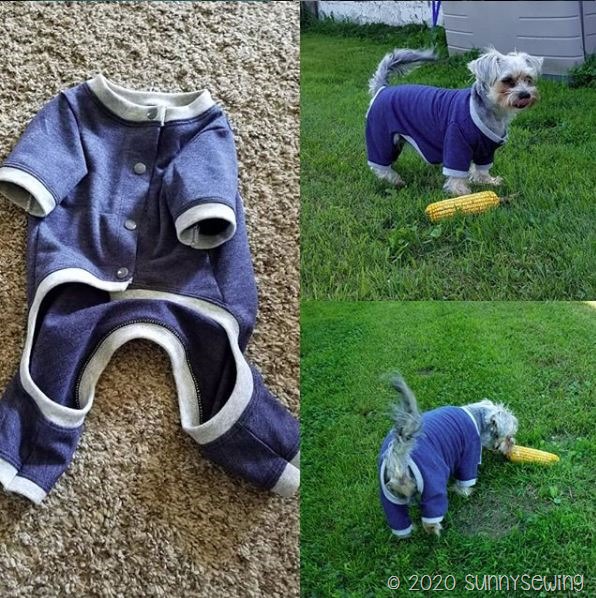
ben bear

Saturday, March 30, 2013

Easter Dress ~ McCall's M6273

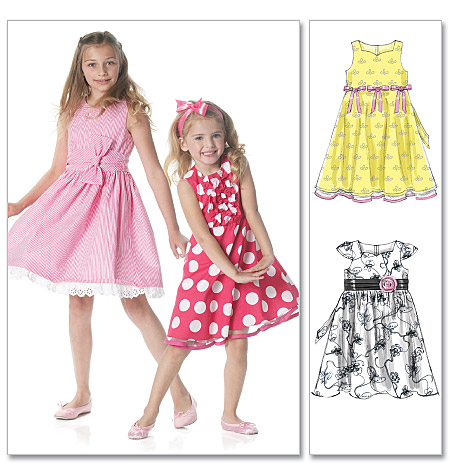
Foolishly I decided to finally sew Miss K's Easter dress on Thursday and Friday (needing it for today, Saturday).  I've had M6273 in my stash so I figured I would attempt it.  Miss K picked View C (the pink and white one on the left).


I traced the pattern, pre-washed the fabric, cut and marked it on Thursday and then sewed it all on Friday.  All in a size 8 which Miss K wears in RTW. The dress is fully lined so it is like sewing 2 dresses. We drive a bit of a distance to visit relatives and the dress looked great after the long car ride!

There are a lot of pieces to this dress.  The pattern calls for 2.25 yards in 45" wide for the dress and 1.5 yards in 45" wide for the lining.  You will also need 2.25 yards of 2" flat eyelet trim, a 16" zipper and a hock and eye.  I waited to the last minute to get any supplies - picking all but the lining up on Tuesday night (Hancock's).

Tutti Frutti (2.5 yards) $17.48
Eyelet (2.5 yards) $4.35
16" zipper $1.99
Total without lining: $25.13 ~ the lining I had already at home and I used exactly 1.5 yards and most of the Tutti Frutti and Eyelet. I would say the entire dress cost about $30; this could have been cheaper had I planned ahead and picked up the fabric and notions on sale.


I followed most of the directions up to the hemming.  #19 and 20 I did not hem the ties as suggested because I didn't want the edges showing.  I sewed them right sides together and turned them inside out - like a tube before attaching them.  This worked but they are skinnier than they should be.  I serged the bodice sides after step 22.  I forgot to serge the lining and dress sides as well as the back of the dress before the zipper.  Mostly because I was pressed for time; I went back and pinked what I could.


The zipper is really long and doesn't need to be.  You could get away with only doing the zipper from the skirt gathering up to the neck; maybe a 9" one? or a 7" one?.  It was a real pain to sew on all those gathers!  I used elastic tape for the gathering itself but it was tough.  It felt like I was making 3 feet of fabric fit into 12 inches.  My machine hated attaching the skirt to the bodice with the 2 fabric layers, 2 lining layers, and elastic tape in the middle. I broke 2 needles and bent a lot of pins.  I also was trying to be so careful to keep the bodice straight underneath but ended up sewing into it and had to rip it out and do it over.


When I got to the hemming I was plain burnt out.  I didn't follow the directions really. I serged the bottom of the dress fabric, turned up an inch, pressed and sewed.  I then turned the lining up 1 inch, turned it up again 1 inch into a double fold and sewed it.  Finally I attached the eyelet by laying it on top of the very edge of the lining hem and sewing it on.  Is this right? I don't know but it worked!


We didn't attach the bow because I liked the dress without.  The "drape" on the front waistline didn't really want to drape at all.

Too bad it is so cold still here in Wisconsin so Miss K had to wear leggings and a long sleeve shirt underneath!  This is a cute sleeveless dress but there is way too much work involved for me to do it over again.  We plan on having Miss K wear it to 2 weddings this summer so at least we get some use out of it!


Overall she looks cute in it and the dress looks pretty- it was just more work than I wanted to deal with on our busy Thursday and Friday.  Miss K got lots of compliments at Easter though so maybe it's great? We took the pictures as we were walking out the door this morning (15 minutes late). I wish the weather would turn nice so we can get outdoor pictures again!

I hope you have a good Easter.

~ Happy Sewing! ~ Kristin ~

Tuesday, November 20, 2012

Cute Coin Purses or Holiday Gift Card Holders~ Tutorial ~ Scrap Buster!

Coin Purse or Gift Card Holder Tutorial


Step 1:
Cut out 2 pieces of fabric and 1 piece of fleece to the dimensions below
(Fleece will be inside fabrics and will not show on finished coin purse)


Step 2:
Place pieces in order of:  1. fabric with right side up. 2. fabric with right side down. 3. fleece on top and centered. Pin together. 


 Step 3: Sew around all fabrics with 1/2 inch seam allowance and leaving a 2 inch opening on the side as shown below.  Clip seams to 1/8 inch and clip corners.


Step 4: Turn inside out from hole in side so that fleece is in the inside and both right sides of fabric are now showing.  Push out all corners (*Hint* I use a bic clicker pencil, with no lead out, to easily push out the small corners).


  Be careful to fold the "hole" together correctly and press entire piece.

 Step 5: Fold like an envelope bringing bottom to the middle and top flap over.  This will show you where you need to place the button on the piece below the flap.  For me it was about 2 inches above the bottom as shown in 3rd picture.


 Mark spot for button and attach it to the piece.  (*Hint* I like to put a toothpick under the button so there is some "give" to the button and is easier for little hands to use within the button hole)


Step 6: After sewing on the button re-fold the envelope and begin to top stitch around all layers of the outside.
(Ignore that there is no button on the bottom here. Oops, forgot to attach first on this one!)


WHEN YOU RETURN TO THE START POINT PIVOT THE NEEDLE TO SEW ACROSS THE TOP FLAP ONLY *** DO NOT SEW ACROSS THE OPENING FOR THE PURSE! *** Follow the green line as shown below.  I used the edge of my sewing foot as a guide along the top opening of the purse to sew across here.


Step 7: Add button hole to top flap. 


And you are done! Here is the inside:

And here are your pouches!


Fabric used:

Boys Will Be Boys Boys Toss Blue                 Kaufman 21 Wale Cool Cords Owls Harvest Natural 
Boys will be Boys                      Kaufman Owls Corduroy

Need some fabric? Want to save some money?  Head to Fabric.com Wednesday for some great sales!
Wednesday Web Buster


~ Happy Sewing! ~ Kristin ~

Saturday, October 27, 2012

Toon Link Mr T! ~ How to make your own Link (Zelda) costume


I've completed the final costume! Whew.  Just in the nick of time.  I actually had this done on Thursday but Mr. T has been gone with a friend.  He came home today and was thrilled with his costume.

The only problem now with both Miss K and Mr. T's costumes is that we are in Wisconsin... ITS COLD!

So I didn't use any pattern for this.  I winged it all pretty much. You can't mess up too much with fleece.


Step 1.  Tunic
I found a tank top that fits Mr. T just right, laid it on top of a double layer of fleece and cut out around the sides and top.  I made it really long in the length until I could check the length while it was on Mr. T.


Then I flipped the top side over to mark exactly halfway (made a clip mark on the center fold).  Then I cut the "V" shape for the front of the tunic as below.

Sew shoulders and sides, flip right side out.  Measure on child and cut to the right length.  Tunic is complete.

2. Leggings and green undershirt: I cheated and bought these.  White leggings (for girls... shhh don't tell him) and a green champion long sleeve tee from Wal-Mart.

3. Belt.  I just measured Mr. T's waist (24 inches) and added 1 inch.  So I cut a 25 inch long rectangle of the brown fleece.  I made this 5-6 inches wide, then folded it in half so the rectangle was about 3 inches wide and 25 long.  I sewed the long side and flipped it inside out.  then tucked in each end and top stitched.  After that I added velcro.  I took yellow felt and cut out a circle, then used black magic marker to draw link's design.  I sewed it to the belt with matching thread.  Belt done.

4.  Hat.
(I swore I took pictures of this but I guess not ~ sorry).
I doubled the fleece again and cut out a triangle.  Then I cut a band in green like the belt and tried it on my own head to get the size just right.  I sewed the sides of the triangle~ leaving the bottom open.  Then attached the band (wrong side of band to inside wrong side of hat.  and flipped it up. Hat done!

5. boots: we used Mr. T's brown hiking boots.


This costume went way easier than the Rainbow Brite!

Happy Halloween!


~ Happy Sewing! ~ Kristin ~

Wednesday, October 24, 2012

Rainbow Brite Deja Vu!

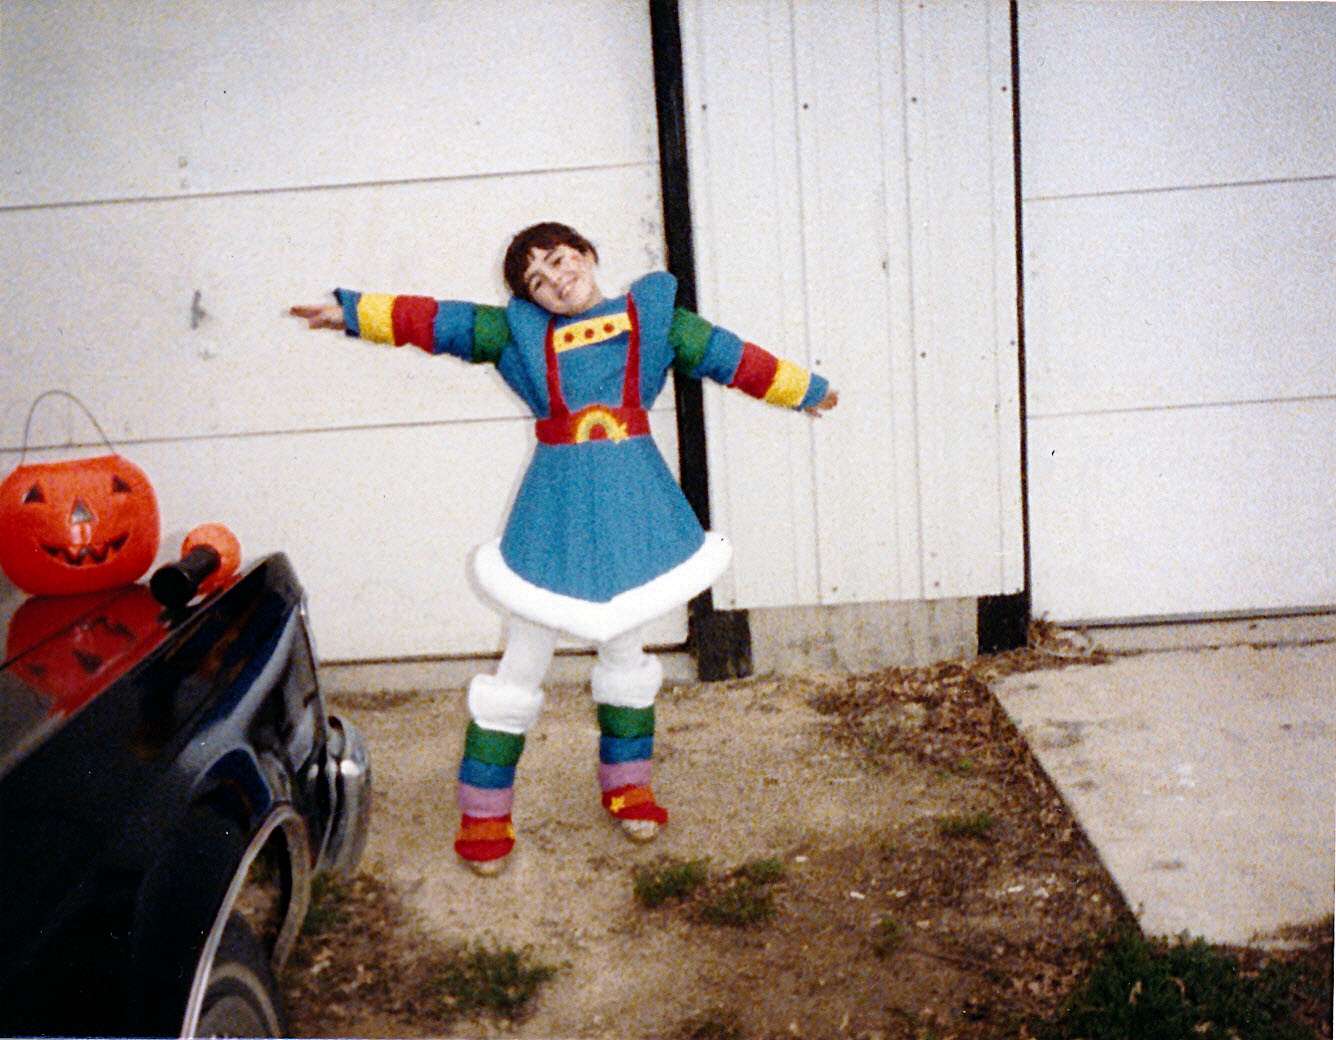
In 1986 I was 7 years old and lived for Rainbow Brite.  I begged my mom to make me the costume for Halloween that year.  She slaved over it and has never, EVER let me forget it!!

I would kill to still have this awesome costume.

Fast forward to present day and Miss K is 6 years old (almost 7).  She tells me she wants to be Rainbow Brite for Halloween and my mom laughs.

Here is my attempt at making the costume with no "real" pattern.  I sort of borrowed the basic layout of the dress from McCalls 6638 (View A, Size 8) and went from there.  I also cheated with the rainbow arms and legs with clown socks! LOL.

Note to self: I will never, EVER sew with crushed panne stretch velour again.  Hate it.  Entirely.
Also, the pattern was either really awfully off, or my fabric didn't agree with it.  The dress part turned out LONG as in almost to the floor so I hacked 8 inches or so off the length.  Then, there is a TON of gathering in the skirt and sleeves (the panne hated this part).  My poor serger really got a workout with this outfit.  The bottom white layer is really fuzzy stuff (Micro Furry White); I was covered in it as was my machines and still is my sewing room!
Total cost of fabric (I have tons left over), bias tape, appliques, zipper, pattern = $16.70
Now that is a great deal!  Oh! and the socks were $5 each pair so $26.70 in all.

The red part I muddled together myself as shown below:

I couldn't find a huge rainbow applique so I improvised with 2 smaller ones.  I prefer the bigger one so maybe I'll look at Wal-Mart tomorrow.

 Here we all are together: Miss K - 2012; Me - 1986: and good ole' Rainbow Brite herself


Happy Halloween from Miss K - now to finish the Toon Link (Zelda) costume for Mr. T


~ Happy Sewing! ~ Kristin ~