Wednesday, July 30, 2014

Vintage Pajamas for the Young Gentleman

Each time I sew with a vintage pattern I am reminded how amazing and lovely they are.  There are markings galore (seam allowances, seam joining numbers, what to do, hem allowances, etc), detailed steps and pictured steps, pieces fit together correctly, and things turn out wonderful and professional looking.


The only bad part of sewing with vintage patterns is that I'm super sensitive to the smell.  I seriously have to wear a mask and gloves when I trace the patterns. :(  Sadly I still tend to break out in hives.  I'm not sure why either. Did every vintage person sew with a cat maybe?  Anyway, it is a small price to pay for the beautiful patterns that result.  After I trace them onto my own tissue paper (You can see my post on what I use and why- here), then I am good to go.

McCall's 3041

I had this adorable pattern for Mr. T with the intent on making him a martial arts looking bathrobe.  That never happened. I realized it was a size 10 and T is pushing into a 12 so if I was to use this pattern, the time is now.

The fabric has it's own story.  I purchased it from Fabric.com in May 2014 - 1.5 yards.  It is called Kaufman Pinpoint Oxford Stretch Shirting Blue. I had hoped to make a dress shirt for T out of it but it was too light in color.  I attempted to return it, received a refund of a whole $7.41, but fabric.com didn't want me to ship it back to them.  So it was free fabric I guess.  Now I kind of feel bad because the fabric is lovely.  It is soft, but crisp enough. It washes well and sews just beautifully.  I am going to see about getting it in different colors.  I could see a button up shirt for me as well as one for T out of this.  Oh, it also has just a touch of lycra in the cotton for a tiny bit of stretch. I highly recommend it.  


Back to the pattern:  It called for 1.75 yards. I had no problem getting the main pieces from the 1.5 yards of blue.  I then used some stashed "Geeks gone wild" (hoarded and beloved) fabric left over from T's amazing bathrobe (that he never wears, sniff sniff) for the accents of pocket, back facing, and front v-neck part.  


Shorts: 
I'll start with them because they are fast and easy.  I just fit them on the folded piece of fabric.  They ended up JUST fitting. So if I made this again I'd widen them about a 1/2 inch on each side.  There is just one pattern piece for the shorts. I made a mock fly instead of the actual fly because I cut my fly facing the wrong way :( and then decided I didn't want to mess with the pattern directions on it.  So I just used my fast and easy way (seen in drawing on this post). I lowered the rise on these by 2.25 inches (talk about high waisted shorts!) because I knew T wouldn't like them that high.  I also sewed the elastic to the top edge, flipped it over, and then cover-stitched.  I didn't want to mess with a casing. 


Shirt: 
Mr. T is a little bit larger in the waist and hip than the pattern calls for - so I added 1/2" to the bottom hip area in front and back pieces, then tapered this up to nothing at the armpit.  I also added 3/4" to the length of the shirt because T likes his longer. The sleeve had 3 inches of ease to squeeze in! It was exhausting.  I have a tiny bit of puckering on both but I'm ok with them.  Next time I would try to reduce that ease, the sleeves have plenty of room for T to move around in without it all. 


The only snag I ran into was attaching the v-neck part together. I couldn't grasp what the pattern asked for.  After doing the back yoke I realize now what the front wanted.  You fold and iron the SA to the right side of the shirt, then fold the SA on the V-neck part to the wrong side of itself.  After this you place the V on to the shirt and stuff the shirt SA under the folded V SA and top-stitch.  Whew. Confusing.  I just did my own thing and it turned out fine.  


The Fit: 
As I mentioned, the shorts just fit.  The top fits nice.  These turned out really cute and I couldn't be happier. 


Can you believe this was the only thing I managed to sew for the Pattern Stash contest at PR?  Last year I did so well, this year the lure of new patterns grabbed hold of me.  


July Totals:
(stash is anything purchased before this year)
Stash used: 4.75 yards
Fabric Out: 10 yards
Fabric In: 11.5 yards

Totals for the year to date:
Stash sew this year: 35.75 yards
Fabric out in 2014: 129.5 yards
Fabric in 2014: 141.25 yards

~ Happy Sewing! ~ Kristin ~

Tuesday, July 29, 2014

The "Just OK" Knit Dress

This was one of those projects I just wanted to be done with.  When I get in those moods I should just walk away, but really I was fed up.  I used Miss K's McCall's M6948 bodice from her maxi dress that fit me.  To be fair - I'm of normal size, McCall's just has tons of ease in this pattern! I used a size 12 that had a finished bust of 35.5! Really? that large for a size 12!!! wow! Lol.


Anyway, I enlarged the armholes by 1/2" because they were tight.  I did my usual square shoulder alteration of 1/2".  I used the skirt I made and didn't like from here - I just cut off the crappy waistband and kept the lining under the fabric.

Here is where I failed, and kept failing.  Instead of lining the dress the correct way I had the lining on the skirt part, and then cut a lining for the bodice.  I just basted it to the fabric like an underlining and treated it as one.  I sewed the casing and had so much bulk fabric (the 4 layers plus the 2 it folded over) so I cut off the bottom skirt and lining part - snipping into the darn casing.  I hobble-fixed this and then somehow got the pin stuck when threading the elastic in the casing, open - not nice and closed.  Frustrated and fed up I just cut a hole in the casing on the inside and pulled out the pin.  I didn't even sew up the casing hole yet or finish the arm bindings.


I'm just sort of over it? I don't really like the under bust gathering from the casing going up instead of down.  I would prefer the gathers on the waistband and lower portion, not under bust.  I'm just picky - these pictures make the dress look fine.  I'm sure I'll go back and fix the arms in a day or two and be content with this dress in the end.

Topping off my frustration, I smacked my arm on my sewing machine getting a bruise and gash.  I scraped my calf on the chair outside and kept getting the camera remote wire caught on things.  Then I stepped on nettles and was bit by a bug while taking these pics.  And I got in the house to find that my blue table was in all the pictures on the bottom. LOL.  Story of my life!  I'm eating chocolate now so it's all better.


Positives:
it is super comfy to wear
It actually fits the back of my neck perfectly!
The pattern is great and I have a woven skirt/knit top cut for Miss K already.

Negatives:
I don't care for the under bust gathers or the poofiness there, other than that it is an ok dress.
I'm going to give it another shot but with a mash up of my Jalie TNT top and this size skirt.

Fabric - Designer Rayon Jersey Knit Stripes Blue/Green, 1.5 yards. Purchased in April 2013 from Fabric.com for $7.19.

I had to test out this pattern just to see how it would turn out for me.  Do you ever have those moments when you feel you just HAVE to try something out?  Even if it goes horribly wrong?

So what is up next? K's dress, Another attempt at the Thurlow shorts, and I just got the Colette Myrtle in the mail too!

July Totals:
(stash is anything purchased before this year)
Stash used: 4.75 yards
Fabric Out: 8.25 yards
Fabric In: 11.5 yards

Totals for the year to date:
Stash sew this year: 35.75 yards
Fabric out in 2014: 127.75 yards
Fabric in 2014: 141.25 yards

~ Happy Sewing! ~ Kristin ~

Saturday, July 19, 2014

Cowl and the tank


The Cowl
Sometimes a successful muslin leads to a not so successful final garment - or maybe the end garment is successful but you realize it wasn't as awesome as at first.

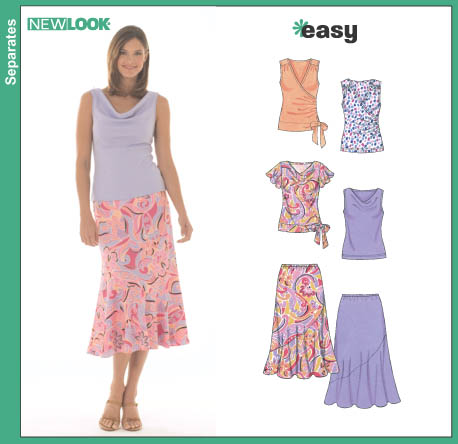
New Look 6470, I had such high hopes for you :)

Here is successful muslin, in case you were wondering.
Alterations:

  • I cut/sewed a size 12 Shoulder, & 14 bust; in the front I used a size 14 hip, but in the back I used a size 16 and added 1/4" to each side.  
  • I also performed a 3/4" square shoulder adjustment.  
  • Used bias for back neck and armholes but ran into issues with the armholes stretching out and looking wonky - so I cut them off and added bias bands. 
  • Added 3 inches to the cowl - this brought it down into the armpit a bit and held it in place better. The underside of the cowl still attempts to show at times
  • The ITY was way more stretchy than my muslin fabric and thus the back was super huge.  I had to take a large dart of 4" out of the back! (2 on each side of the dart).  

This is not my coveted fabric - I couldn't yet cut into it until I had at least 1 perfect outcome. This fabric was to be a dress last year (or the year before, I forget) but it went awry so I chopped off the bodice and saved the 1 yard skirt part.  I'm ok that I probably won't wear it again.  


Just before this pic I saw a creepy dude walking our way

Here is my "take the darn picture K" look - with bonus creepy dude in the background. :D


Really, I like cowls on me and I think they are fast to sew.  I just wish I could have nicer armholes and that the darn cowl wouldn't flip so much. Plus, I realized that they just aren't practical for me because I bend down a lot in my day to clean, pick up the puppy, do the laundry, etc.  I am not comfortable flashing everyone!  I may try one of the other views for this pattern, but I think I'll save my coveted fabric for something else ;-)

And the Tank
K picked up this awful fabric last year at Hancocks one day. I have no idea what the stuff is but I dreaded sewing it up.  It is very thin, see-through, slippery, and has wavy vertical lines throughout - almost like a gauze but with no stretch. (Does anyone know what this is?) She's been whining about it here and there so I finally sewed it.  ** mystery solved, it is a Georgette **


I stole my Ottobre pattern (06/2012 #22) and lengthened the bodice into a tank. It is a size 140.  I also widened the armholes a bit because they were tight in her previous nightgowns


I made a sandwich (tissue paper on bottom, fabric, pattern tissue paper on top) to cut it out - because the fabric was slippery - this worked great. I used fold over elastic for the "bias" binding and flipped it to the inside, then topstitched.  I used a tiny rolled hem foot for the hem- I have strong dislike for that thing, and it must not like me back. I also sewed with french seams because the fabric is so see-through. K has a white tank under it in all these pics.  


The tank is cute, but tight over the chest.  I'm not sure she will get to wear it again.  Sad, because she LOVES this fabric. 


July Totals:
(stash is anything purchased before this year)
Stash used: 3.25 yards
Fabric Out: 6.75 yards
Fabric In: 5.5 yards

Totals for the year to date:
Stash sew this year: 34.25 yards
Fabric out in 2014: 126.25 yards
Fabric in 2014: 135.25 yards
~ Happy Sewing! ~ Kristin ~

Thursday, July 17, 2014

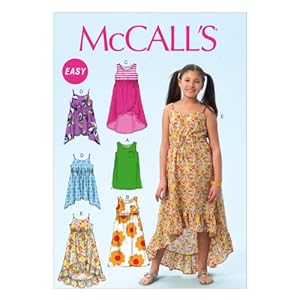
McCall's Maxi Dress ~ M6948

What a winner of a pattern.  It is a simple pattern but I like the options it includes  The pattern states you can use a woven or a knit, plus it goes from a size 7 all the way up to a size 14. It is listed as an "easy" pattern, and it is.


I sewed a size 10 for K who is now in a 10/12 in RTW.  And if you plan on using this pattern, piece 11 and 12 are the exact same piece for view B so I just used piece 12 for front and back skirt since I traced it first.


I did have to shorten the skirt a good 3-4 inches.
Because I used jersey I didn't staystitch the neckline or arm edges.  I also didn't use prepackaged bias tape - instead I opted to use the red cotton/lycra jersey like the skirt.


Fabric:
Skirt, pocket and binding from: 2 yards Red Laguna Jersey Knit by Kaufmann bought Feb 2014 for $13.96
Bodice from: 1/2 yard Novelty Printed Sunflower Rayon Jersey Knit Floral White 75% rayon/ 25% polyester.  I bought it back in April 2013 $3.49.
Both are from fabric.com and the total comes to : $17.45


For some reason my pocket wasn't cooperating with me but I plopped it on anyway, misshapen and all. When you attach the bodice to the skirt you sew with a 1" seam allowance.  This becomes the casing, but I couldn't fit my 3/4" elastic through after I topstitched so I used 1/2" FOE, but didn't fold it over, keeping it flat.  K much prefers this because the elastic is not tight on her and provides ample stretch.


I very much recommend this pattern and I can already see plans in my head to use up some wovens.  I think a knit bodice/woven skirt part would work great.


A funny side note - I tried this on myself because it looked like it would fit. . . and it did!! Except for small armholes, the rest fit great.  I think I will make myself a nice knit dress out of it :D  The shoulders and bodice were great and the skirt was just the right flow-ness.  It even hit me right at the knee.  I know if it was sewn in woven it wouldn't fit but cotton/lycra jersey? Oh yeah!

July Totals:
(stash is anything purchased before this year)
Stash used: 1.5 yards
Fabric Out: 5 yards
Fabric In: 5.5 yards

Totals for the year to date:
Stash sew this year: 32.5 yards
Fabric out in 2014: 124.5 yards
Fabric in 2014: 135.25 yards

~ Happy Sewing! ~ Kristin ~

Tuesday, July 8, 2014

Successful Muslin! New Look 6470

Yay! A successful muslin!  I can't wait to get a few of these made up.  I have been saving a super loved fabric just for this tank.  It was one of those instances when I had it already made in my mind, I just needed to find the pattern to match that image.

New Look 6470

  • I cut/sewed a size 12 Shoulder, & 14 bust; in the front I used a size 14 hip, but in the back I used a size 16 and added 1/4" to each side.  
  • I also performed a 3/4" square shoulder adjustment.  
  • The muslin sewed together really fast so I assume the real tanks will take about an hour and a half.  
  • This is a muslin only. The fabric is so scratchy -ick.  The description was "soft" but it is not even close. It is a poly matte jersey.  I couldn't wait to take it off. lol. It did have great drape though. 


Changes to make to final versions:

  • Use bias for back neck and armholes.  Just turning and sewing isn't very pretty.  
  • Add inches to the cowl - this will bring it down into the armpit a bit and hold it in place better. (The cowl is only an inch on the underside and keeps trying to pop over. I will be shooting for 4 inches in total cowl length on the flipping side). 


As you can see I'm still wearing my too-big Thurlows in these pictures :)

~ Happy Sewing! ~ Kristin ~

Sunday, July 6, 2014

Thurlow Reveal

I've wanted this pattern for a long time.  I was very excited to get started on it and get to the completed shorts.  I was still hopeful when I made the muslin that these would be the best shorts ever!  Well, they are finished.  And too big.  The waistband is like 2.5 inches too big.  I still like them a lot.  I have plans to remake them in a much smaller waist size.


Fabric: 1.5 yards of 54" wide, brown  (taupe) flannel twill.  Bought the end of May for $6 from fashionfabricsclub.com; Dreamy, soft and lightweight.  I feel like I'm wearing nothing when these shorts are on!  Though I'm not sure the lightness works for these shorts - there is too much draping and not enough stiffness; it wrinkles easily too.  Love the fabric though.


Time to sew: 6 hours; but I broke it up over 5 days because it was too much straight through time for my body to handle.


Instructions: short and to the point.  I didn't follow them but instead went with the amazing sew-along posts by Lauren over at Lladybird.com.  If you are sewing these Thurlows, you want to follow her posts.  Wow!  They are step-by-step with excellent pictures.  She made sewing these a breeze and not one time was I lost or head-scratching, even with the welt pockets.


Adjustments:
I have a 29" waist and 42" hip.  I sewed a size 10 but took off 1/4" on each side of front and back pants, to take 1" off the waist total.
I found that I kept having bagginess under the rear end and I just couldn't live with it.  So I finally found a bit of info in the Threads Fitting for Every Figure book. See below picture.


This is what I did to get rid of that poofy part. It was something about full hip, thinner leg... I didn't' read about any of the info, just did the adjustment according to the picture :D

IN THE FOLLOWING PICS I'M HOLDING THE WAISTBAND TIGHT EITHER FRONT OR BACK SO THEY STAY UP ON ME :-)


Notes:

  • The pattern doesn't state what weight of interfacing to use (I guess it's up to our discretion?)
  • I find it easier to understitch seams, then trim and grade them - personal preference. 
  • Step #15 I don't like to sew the side, square corner of the waistband until after I attach it to the pants.  I feel this gives me more of a straight line up from the zipper to the waistband end. (not the triangle waistband piece, the square one)
  • Step #18 I wish it would have told me to sew the inside button onto the lining of the waistband before sewing the lining down onto the waistband.  I dislike hand sewing!
  • Step #21 doesn't tell you how much to press up and hem for the shorts.  I just folded 1/4" up and then 1", for a 1" hem.  
  • The cuffs didn't look right on me so I didn't' turn them up. 

Oh, and I had such a hard time tracing this pattern because it was a very light dashed line.  So I put my pattern piece on top of my tracing paper, then used a sharpie to outline the pattern and wa-lah! It showed up underneath.  The ink bled through the pattern paper -didn't ruin it - and transferred the lines to my tracing paper. * I would strongly suggest putting an extra layer under the tracing paper (I used some freezer paper) because my table didn't appreciate the black marks that bled through the pattern paper and tracing paper onto the table. *


So expect to see this pop up again sometime on the blog.

~ Happy Sewing! ~ Kristin ~