

(pillows above I made after this tutorial was created - you can find them here)
I love pillows. They are fun to look at and decorate with as well as practical.
My kids love pillows. They are great to throw around as well as build forts with.
My husband loves pillows. They are great for his feet to prop up on as well as his head.
Who doesn't love pillows? We needed more in our house so I set out to make some fast pillows.
We also have really bad allergies and asthma in my house (plus messy kids) so I needed them to be easy to wash as well.

Living Room received soft suede green and fun chocolate rosette!

Miss K's Room received purple super soft minkee
I love how fast they were to make and how they all turned out! The kids have man(or should I say kid) handled them all already. They have even been outside in a huge cardboard box as ship pillows and on the trampoline..... sigh.
Want to make some of your own? Here's how!
Awesomely Easy Zippered Throw Pillow ~ Tutorial

Supplies Needed for 2 pillows 14 x 14 inches in size:
- 2 14 inch zippers
- 1/2 yard of fabric cut into four squares of 14 x 14*
- 2 pillow inserts 14 x 14
- matching thread
- pins
- something to mark fabric with
- ruler
Let's Get Started:
1. Place 2 squares right sides together and find where you want the bottom of the pillow to be. Then pin both squares together. Using ruler mark 2 inches in on both sides of bottom of pillow as shown below. (Ignore sew, backstitch, baste until step 2).

2. At the sewing machine you will do the following ONLY to the bottom side you pinned and marked. Sew to first mark. Backstitch. BASTE across big spot to the next mark. Backstitch. Sew to the end of the bottom. See picture above. I used 1/2 inch seam allowance for all of pillow.
3. Putting in the zipper. Open the two squares right sides down on a table so that they are flat like below. Finger press or Iron open seam you just made. Lay zipper on top of this seam. See second picture before pinning!
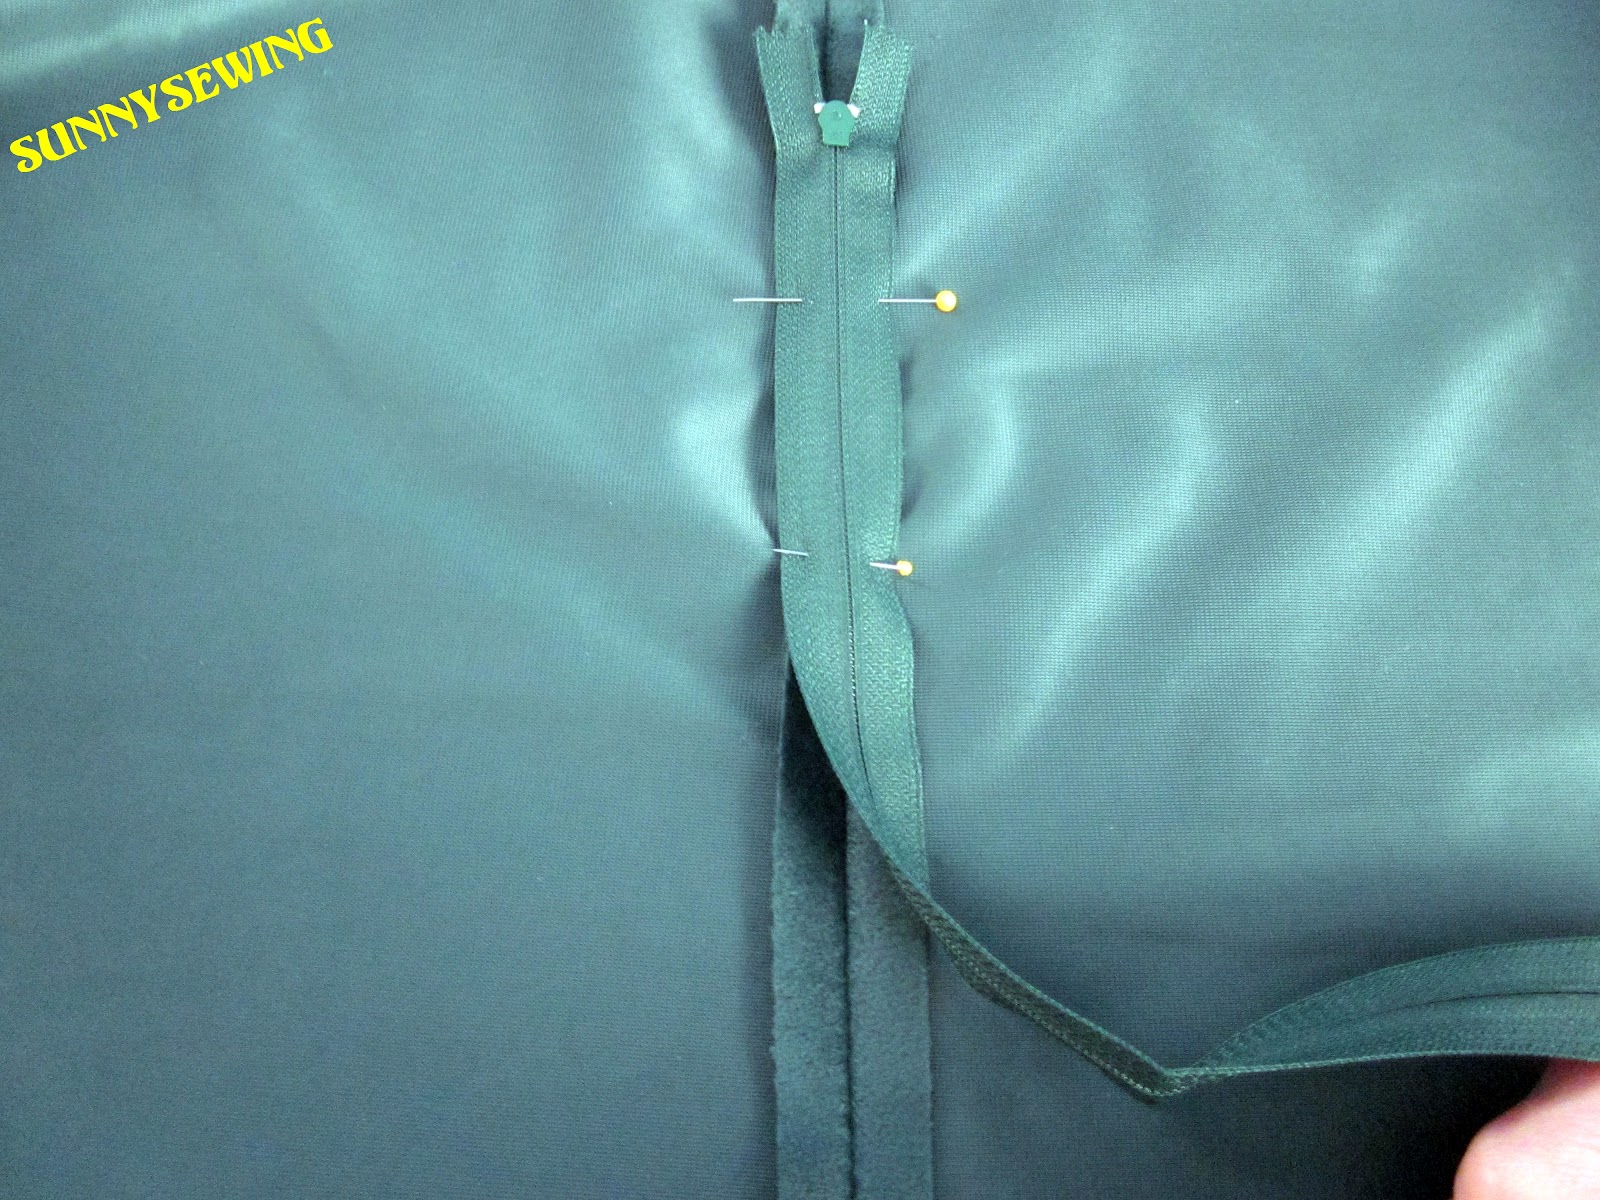
4. You need to make sure zipper teeth are lining up in the exact center of the seam you made as seen below. Pin carefully and make sure the fabric is not jumbling up when pinning. You want the seam side to be flat while you sew. Also, you want to make sure your first pin is where the 2 inch mark you made was. Then the last pin is where the other 2 inch mark you made was. This is were you will go ACROSS the zipper when sewing around it.

After you pin in place it should be like the below picture:

5. Use zipper foot to sew around the entire zipper. Go slowly and carefully especially when going by the zipper pull. I like to sew close to it, then stop and lift my zipper foot up to pull the zipper back where I already sewed, put foot back down and proceed. It is not always easy to move that stinking zipper! :-) Also, I stitched and backstitched 3 times over the ends of the zipper to make sure they were secure.

When finished going around it should look like the below, when opened flat (right sides up)

6. Very carefully seam rip the basted part. It is the middle of the rectangle you just sewed around the zipper. See below.

When all is seam ripped, open the zipper.

7. The home stretch! Leave zipper OPEN! at least part-way. place right sides of pillow together and pin.

8. Sew around the remaining 3 sides with 1/2 inch seam allowance. Then clip corners (seen below).

9. Turn pillow right side out through the zippered opening and poke out corners.

10. Stuff pillow insert into pillow shell with the zipper being on the bottom. YAY! Your pillow is complete!

I love that this looks like a mouth!!

Now go on and make another, or 2 or 4 or 6! I even upcycled an old tee shirt to make one of these :-D
Like the fabric? Want to get some? Click the pictures below to go right to the exact fabric at Fabric.com
Remember: You only need 1/2 yard for 2 pillows in 14 inches!


Plush Suede Hunter Rosette Chocolate Lavender Minky
**Price listed is at time of post**Purple checkerboard Minkee is no longer offered**
~ Happy Sewing! ~ Kristin ~
No comments:
Post a Comment
Your comments really make my day! I read each and every one. Thank you!
Sorry for the word verification. I've had too many spammers lately.